Leo's Tinker Pi
My first computer
Sometime around 1992-1993, shortly after Windows 3.1 was released, my parents brought home our first computer from Micro Center in Westerville. From the moment my dad got it set up I remember loving exploring the operating system and playing games on floppy disks like Wolfenstein 3D and Lemmings. The games were fun, but I got just as much enjoyment exploring how the disks actually worked — looking at the magnetic platter inside and watching the spring-loaded cover slide open and shut.
A year or two later we upgraded the RAM and hard drive, and that’s when I got to see the motherboard, ribbon cables, power supply and circuitry inside. It was one of the defining moments of my childhood and started me down the path to becoming a software engineer. I’ve never properly thanked my parents for buying that computer — and for letting a nine-year-old tinker with the OS, rearrange the hard drive, and generally treat the family computer as a personal science experiment. Every family computer after that first one had my fingerprints all over it. By high school I was the unofficial family IT department. Mom, Dad — if you’re reading this: thank you. This is your fault. 😄
Now that I’m a father, I want to give my kids those same opportunities if they show any interest in any corner of computer engineering — software, hardware, or beyond. I’ve tinkered with Raspberry Pi boards on and off over the years, going back to the Pi 1B+ I bought in 2014, but I never really made anything I felt was original or innovative. Mostly tutorials and package installs. Between Leo saying he wanted to “build a robot,” my background in software, and finally having an LLM to help me break through the roadblocks that used to make me quit, I wanted to give it another real go — with him.
Robot Curiosity
For almost the past year, Leo has been into “robots.” I’m not entirely sure what sparked it, but it was around the time we read The Wild Robot — and he locked onto it and hasn’t let go. The dinosaur toys that filled his room were quickly replaced with robot-everything, and he started asking for a “real robot.”
He’s only six and a half, so he’s just starting to read, let alone code. What he had in mind was probably a fully autonomous sci-fi movie robot. What I found was the Wonder Workshop Dash — a programmable STEM robot for kids with an iPad app that uses visual puzzle-piece coding called Blockly. My wife and I got one for him for Christmas and he immediately loved it. To my surprise he picked it up fairly quickly — building simple programs with loops and conditions within a few weeks.
But after a few months, the limitations of what Dash could do started to show, and I saw him pulling it out less and less. Here’s the thing though: that Blockly app left a mark. Visual puzzle pieces that snap together and make something real happen — that was the model in his head for what “coding” looked like. I’d remember that later.
Renewed Inspiration
I don’t remember exactly what triggered it, but one day it dawned on me to pull out my old Raspberry Pi boards from a box in my basement and show Leo. He asked what it was, I explained it could be used for building different things and powering small “robots,” he asked a few more questions, then ran off to play.
I started with my Pi 1B+, but quickly realized it was underpowered for nearly anything non-trivial — it has less compute than even the original Pi Zero. So instead I wired up a Pi Zero to a breadboard with a few LEDs and momentary switches, and wrote a simple reaction-time game: buttons light up at random, first person to press theirs wins the round. The kids loved it. Leo wanted to keep the breadboard in his room afterward.
When I went up to his room later that night, he was already moving some of the wires around and asking what else he could add to the board. That’s what got me thinking — how could I actually set this up so he could do some of this on his own?
There’s no way a six-year-old is writing Python. But then I remembered: you can use Scratch on the Pi to control the GPIO pins directly. And Leo already understood the puzzle-piece coding model from his Blockly app on Dash. He didn’t need to know what GPIO stood for — he just needed a way to snap blocks together and watch something happen. This was exactly that.
The LED lightbulb in my head went off.
He’s got an iPad with a keyboard that basically works like a laptop. I didn’t want him to have a full desktop setup in his room, so directly connecting a keyboard, mouse, and monitor was out. But what if he could RDP into the Pi from the iPad? I’d used RDP from my iPad plenty of times — remoting into servers on the go, on-call support when out of town — and it worked well. A few searches later, this all seemed definitely feasible.
Parts
-
Includes breadboard, GPIO breakout board, SD card, power supply, and case
-
Acts as display and keyboard over RDP — any iPad with the Windows App will work
-
Blue, green, yellow, and red — color-matched to dupont wires so the breadboard is readable at a glance
-
5mm, assorted colors
-
Color-matched to the push buttons
-
Optional — added later to demonstrate more possibilities
Setting it up
Sourcing the Pi 4
I could have ordered new, but I searched Facebook Marketplace first and found someone selling exactly what I was looking for: a Raspberry Pi 4 Ultimate Kit (4GB) that included a breadboard and GPIO breakout board. Next day I met up with the seller for a parking-lot handoff, brought the kit home, and started setting it up immediately.
I flashed the SD card with the latest version of Raspberry Pi OS Trixie using the official Raspberry Pi Imager, plugged the Pi into my monitor, ran updates, got SSH working — things were looking great. Then I tried to install xrdp, and that was the beginning of a multi-hour hair-pulling trial-error-debug session.
Where xrdp falls over on Trixie
I was hitting issue after issue — nothing but black screens. No error message, no indication of what was wrong. I pulled up the logs with Claude’s help and started working through the crashes methodically: sometimes the window manager was dying with a SIGSEGV before anything painted; sometimes panels from the local desktop were leaking into the RDP session and taking it down from there. I tried at least five different xrdp configurations. Nothing worked.
Eventually I asked Claude to think differently — forget the config tweaks, is there a different approach entirely? That’s when it surfaced the real root cause: Trixie has fully migrated the Raspberry Pi Desktop to Wayland. The default compositor is now labwc, and the desktop components — lxpanel-pi, wf-panel-pi, pcmanfm-pi — are all built against Wayland libraries. xrdp is an X11 protocol; when it tries to start the standard Pi desktop in an X11 session, the desktop pieces hit Wayland code paths that aren’t there and crash immediately. (Short version: the new desktop speaks a language xrdp doesn’t understand.) The solution was simple: use a different desktop environment for RDP sessions.
The Xfce4 fix
The fix turned out to be surprisingly clean: skip the default desktop entirely for RDP sessions and use Xfce4 instead. Xfce4 is pure X11. No Wayland dependencies. It just works with xrdp.
Concretely:
sudo apt install -y xrdp xfce4 xfce4-goodies
sudo systemctl enable --now xrdp
Then edit /etc/xrdp/startwm.sh and replace its final exec lines with:
exec dbus-launch --exit-with-session startxfce4The dbus-launch matters because xrdp creates a session that bypasses the normal login process, so D-Bus isn’t started for you. Without it, Xfce4 starts but its components can’t talk to each other, and you get yet another black screen with no error.
OMG not another black screen
After going through the process of swapping in Xfce for RDP sessions, I was feeling optimistic to test again and finally see the desktop show on the iPad.
Nope. Another black screen. At this point I was glad the kids were in bed for the night so I could let out a few “bad words”.
This was the final landmine: Trixie defaults to auto-login for the primary user. If the Pi is already in a local desktop session for that user when an RDP request comes in, xrdp can’t start a second session for the same user — and the failure mode is another silent black screen. I simply had to disable that in raspi-config (System Options → Boot / Auto Login → Desktop, not Desktop Autologin).
If this didn’t work I was ready to call it quits for the night. But alas, success. The Xfce desktop was up and working flawlessly and I was so excited that I wanted to commit the cardinal sin of waking my sleeping child to show him I finally got it working.
Two more Trixie footnotes
A couple of small things for anyone walking the same path:
- The classic
pigpiodaemon is no longer in the apt repos. Uselgpioas the gpiozero backend instead —sudo apt install python3-gpiozero python3-lgpioand setGPIOZERO_PIN_FACTORY=lgpioin/etc/environment. That covers LEDs, buttons, and basic motors.- Scratch 3 isn’t installed by default unless you install the “Full” OS. Simply run
sudo apt install scratch3and you’re set.
The moment it worked
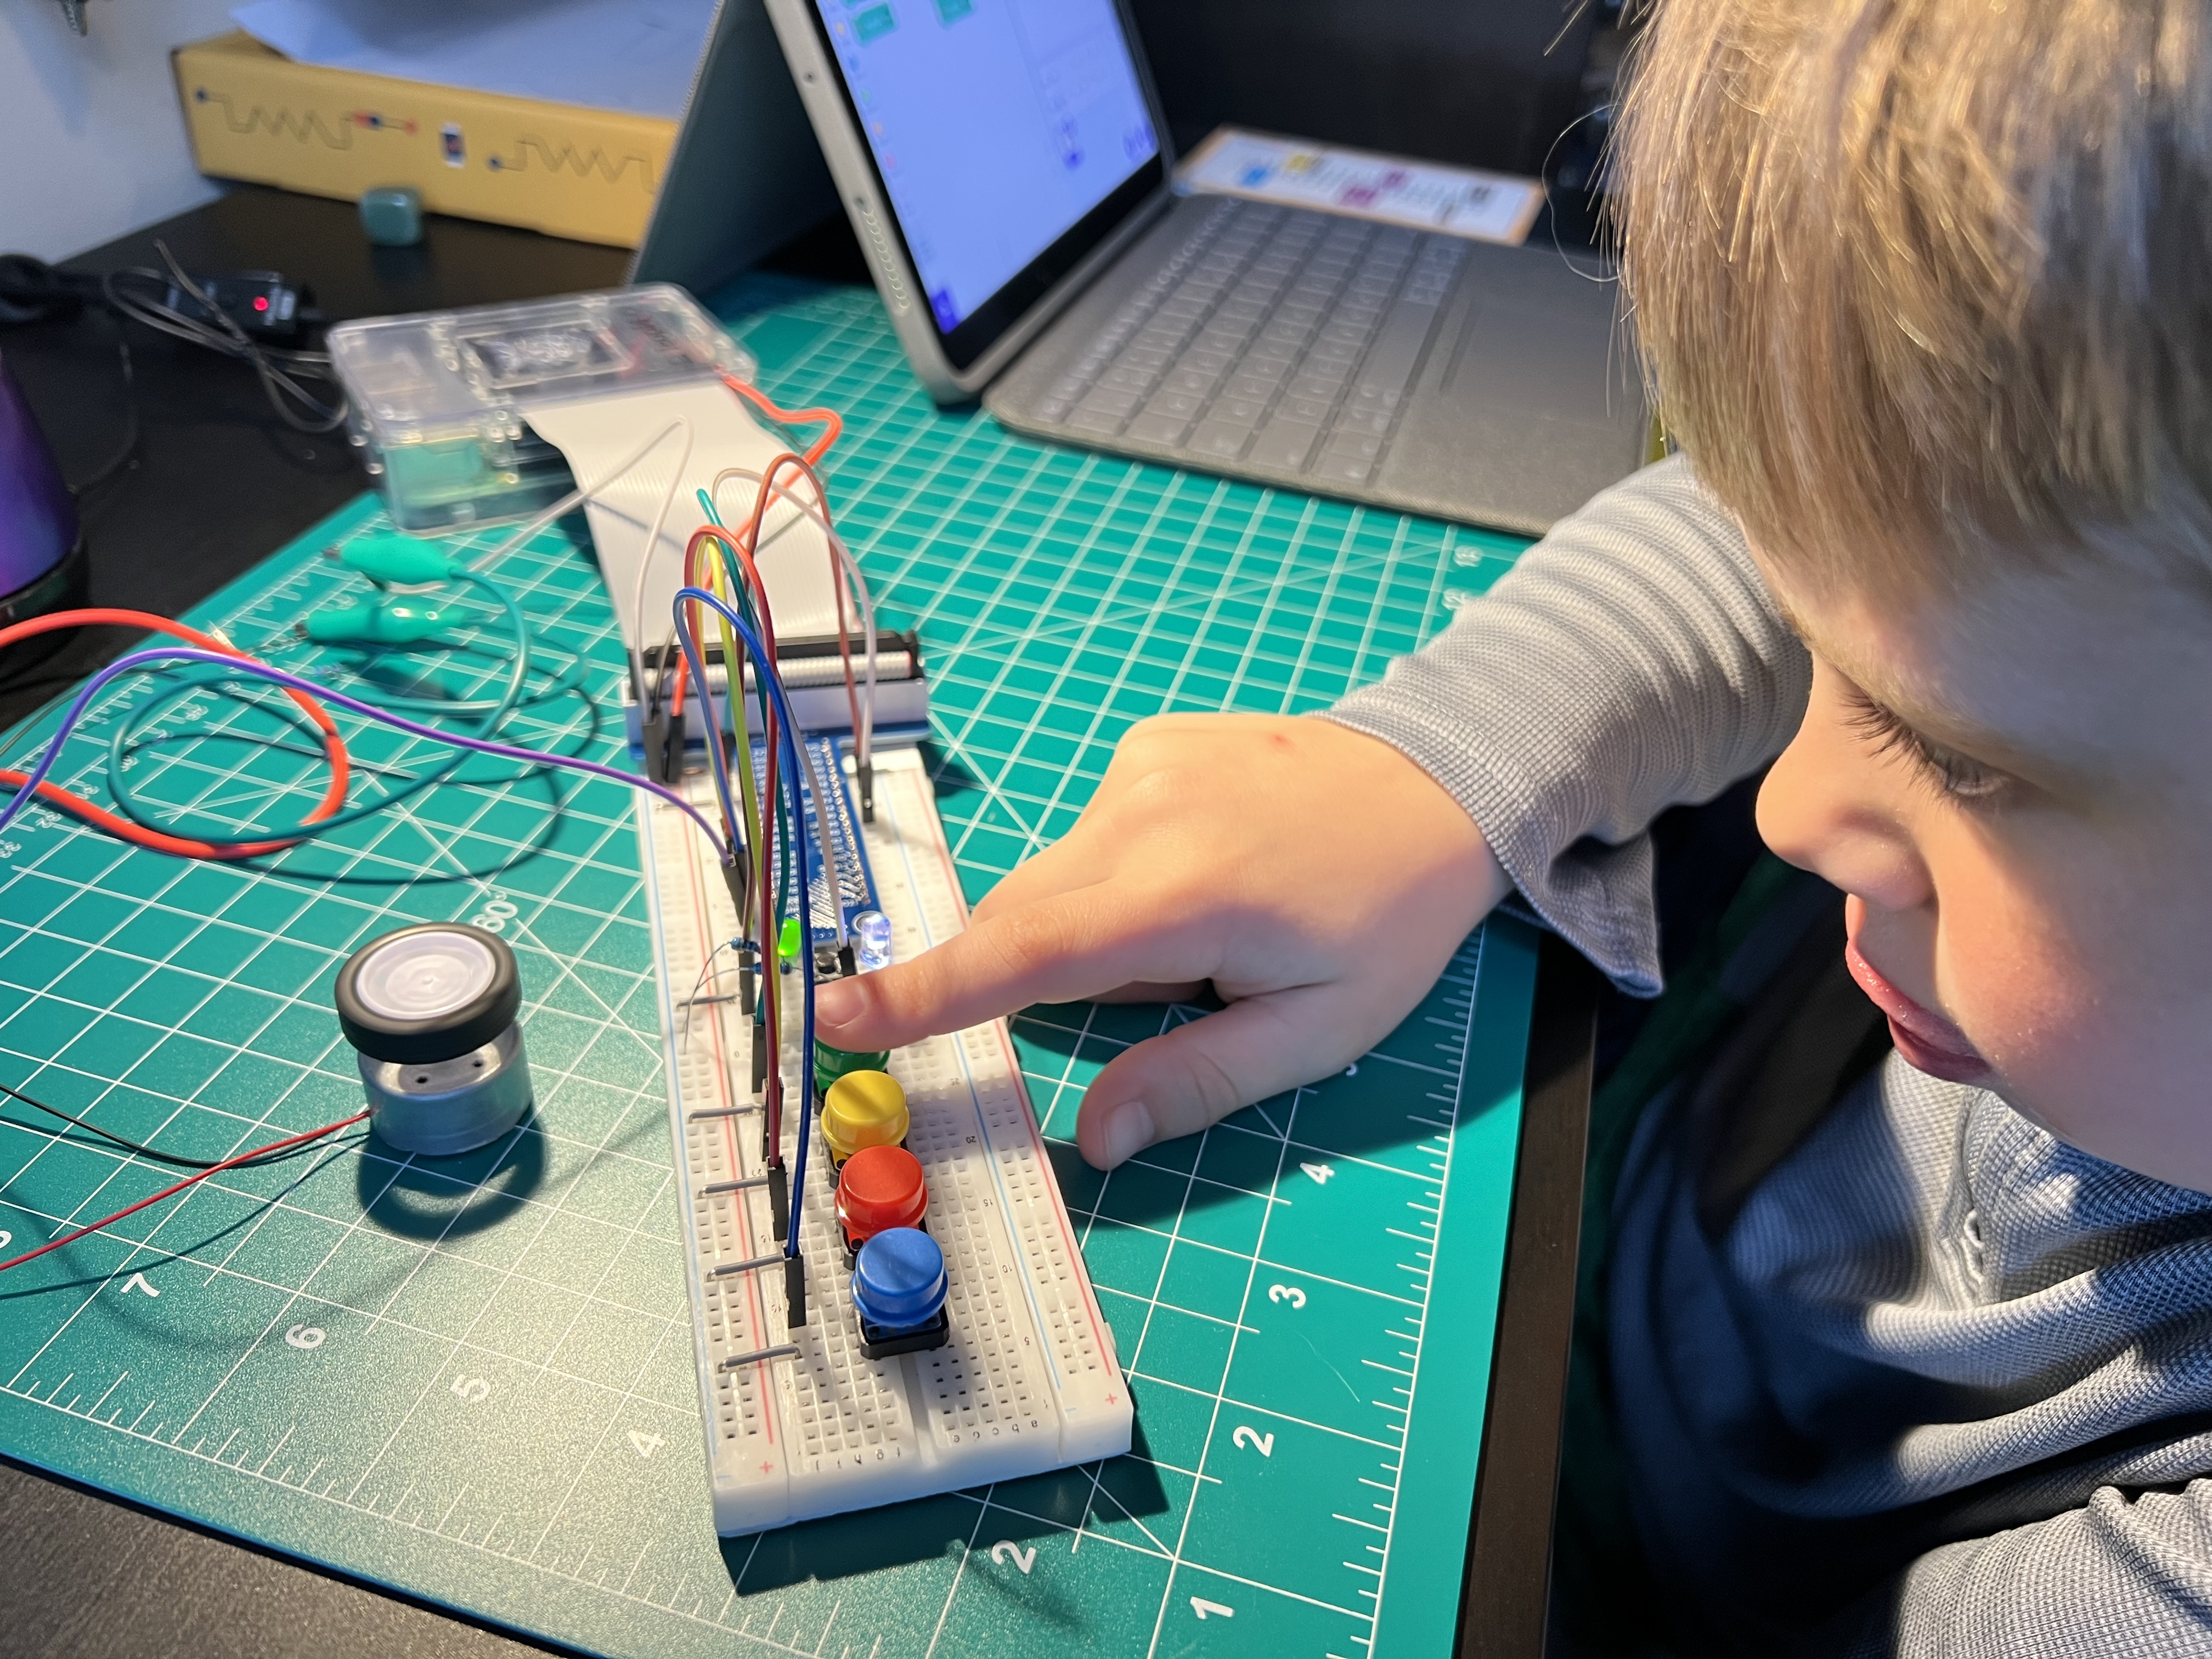
These are the moments as a parent that I get excited for like Christmas morning as a kid waiting in anticipation for an entire night. I had pre-wired blue, green, yellow and red momentary switches to GPIO pins with color-matching dupont wires along with a few LEDs to a breadboard using the GPIO breakout board. Everything was ready and working just as I’d hoped.
The next morning after breakfast I pulled it out and showed him what I’d made. At first he didn’t say much, but I could see the excitement in his eyes and the gears turning in his head. It’s amazing how young kids can intuitively use technology. As far as I know he’s never used a traditional desktop with keyboard and mouse as the only input, but the Microsoft Windows app (formerly called Remote Desktop) actually works really well using both the touch screen and small trackpad on the Logitech Folio iPad case. I showed him how to start Scratch and as soon as he saw the puzzle pieces he said “this looks like programming Dash”. YES!
From there, I just added the GPIO extension in Scratch and then let him explore and start connecting pieces together. Within a few minutes he found the green wire connected to pin 6 and connected a sound event for a meow sound that he had altered to sound like a “robot meow”. He then figured out he could press a button that made the default Scratch cat figure rotate and then he toggled the LED light. I could tell he was having a great time especially when he started yelling for mom to come see his new program he wrote.
At that point I wanted to keep him thinking about how this has a bit more “endless possibilities” by grabbing a small little motor and showing him how to wire that up to a new pin. The GPIO breakout board makes it easy to follow the wires to see which pin a component is connected to. He followed the wire to find the pin number and added another toggle event from one of the unused buttons. A few simple clicks and when he saw the motor turn on and off he was speechless with amazement.
At this moment for me, it was good to feel the “parenting win” after coming up with the idea and seeing it come to life on Leo’s desk.
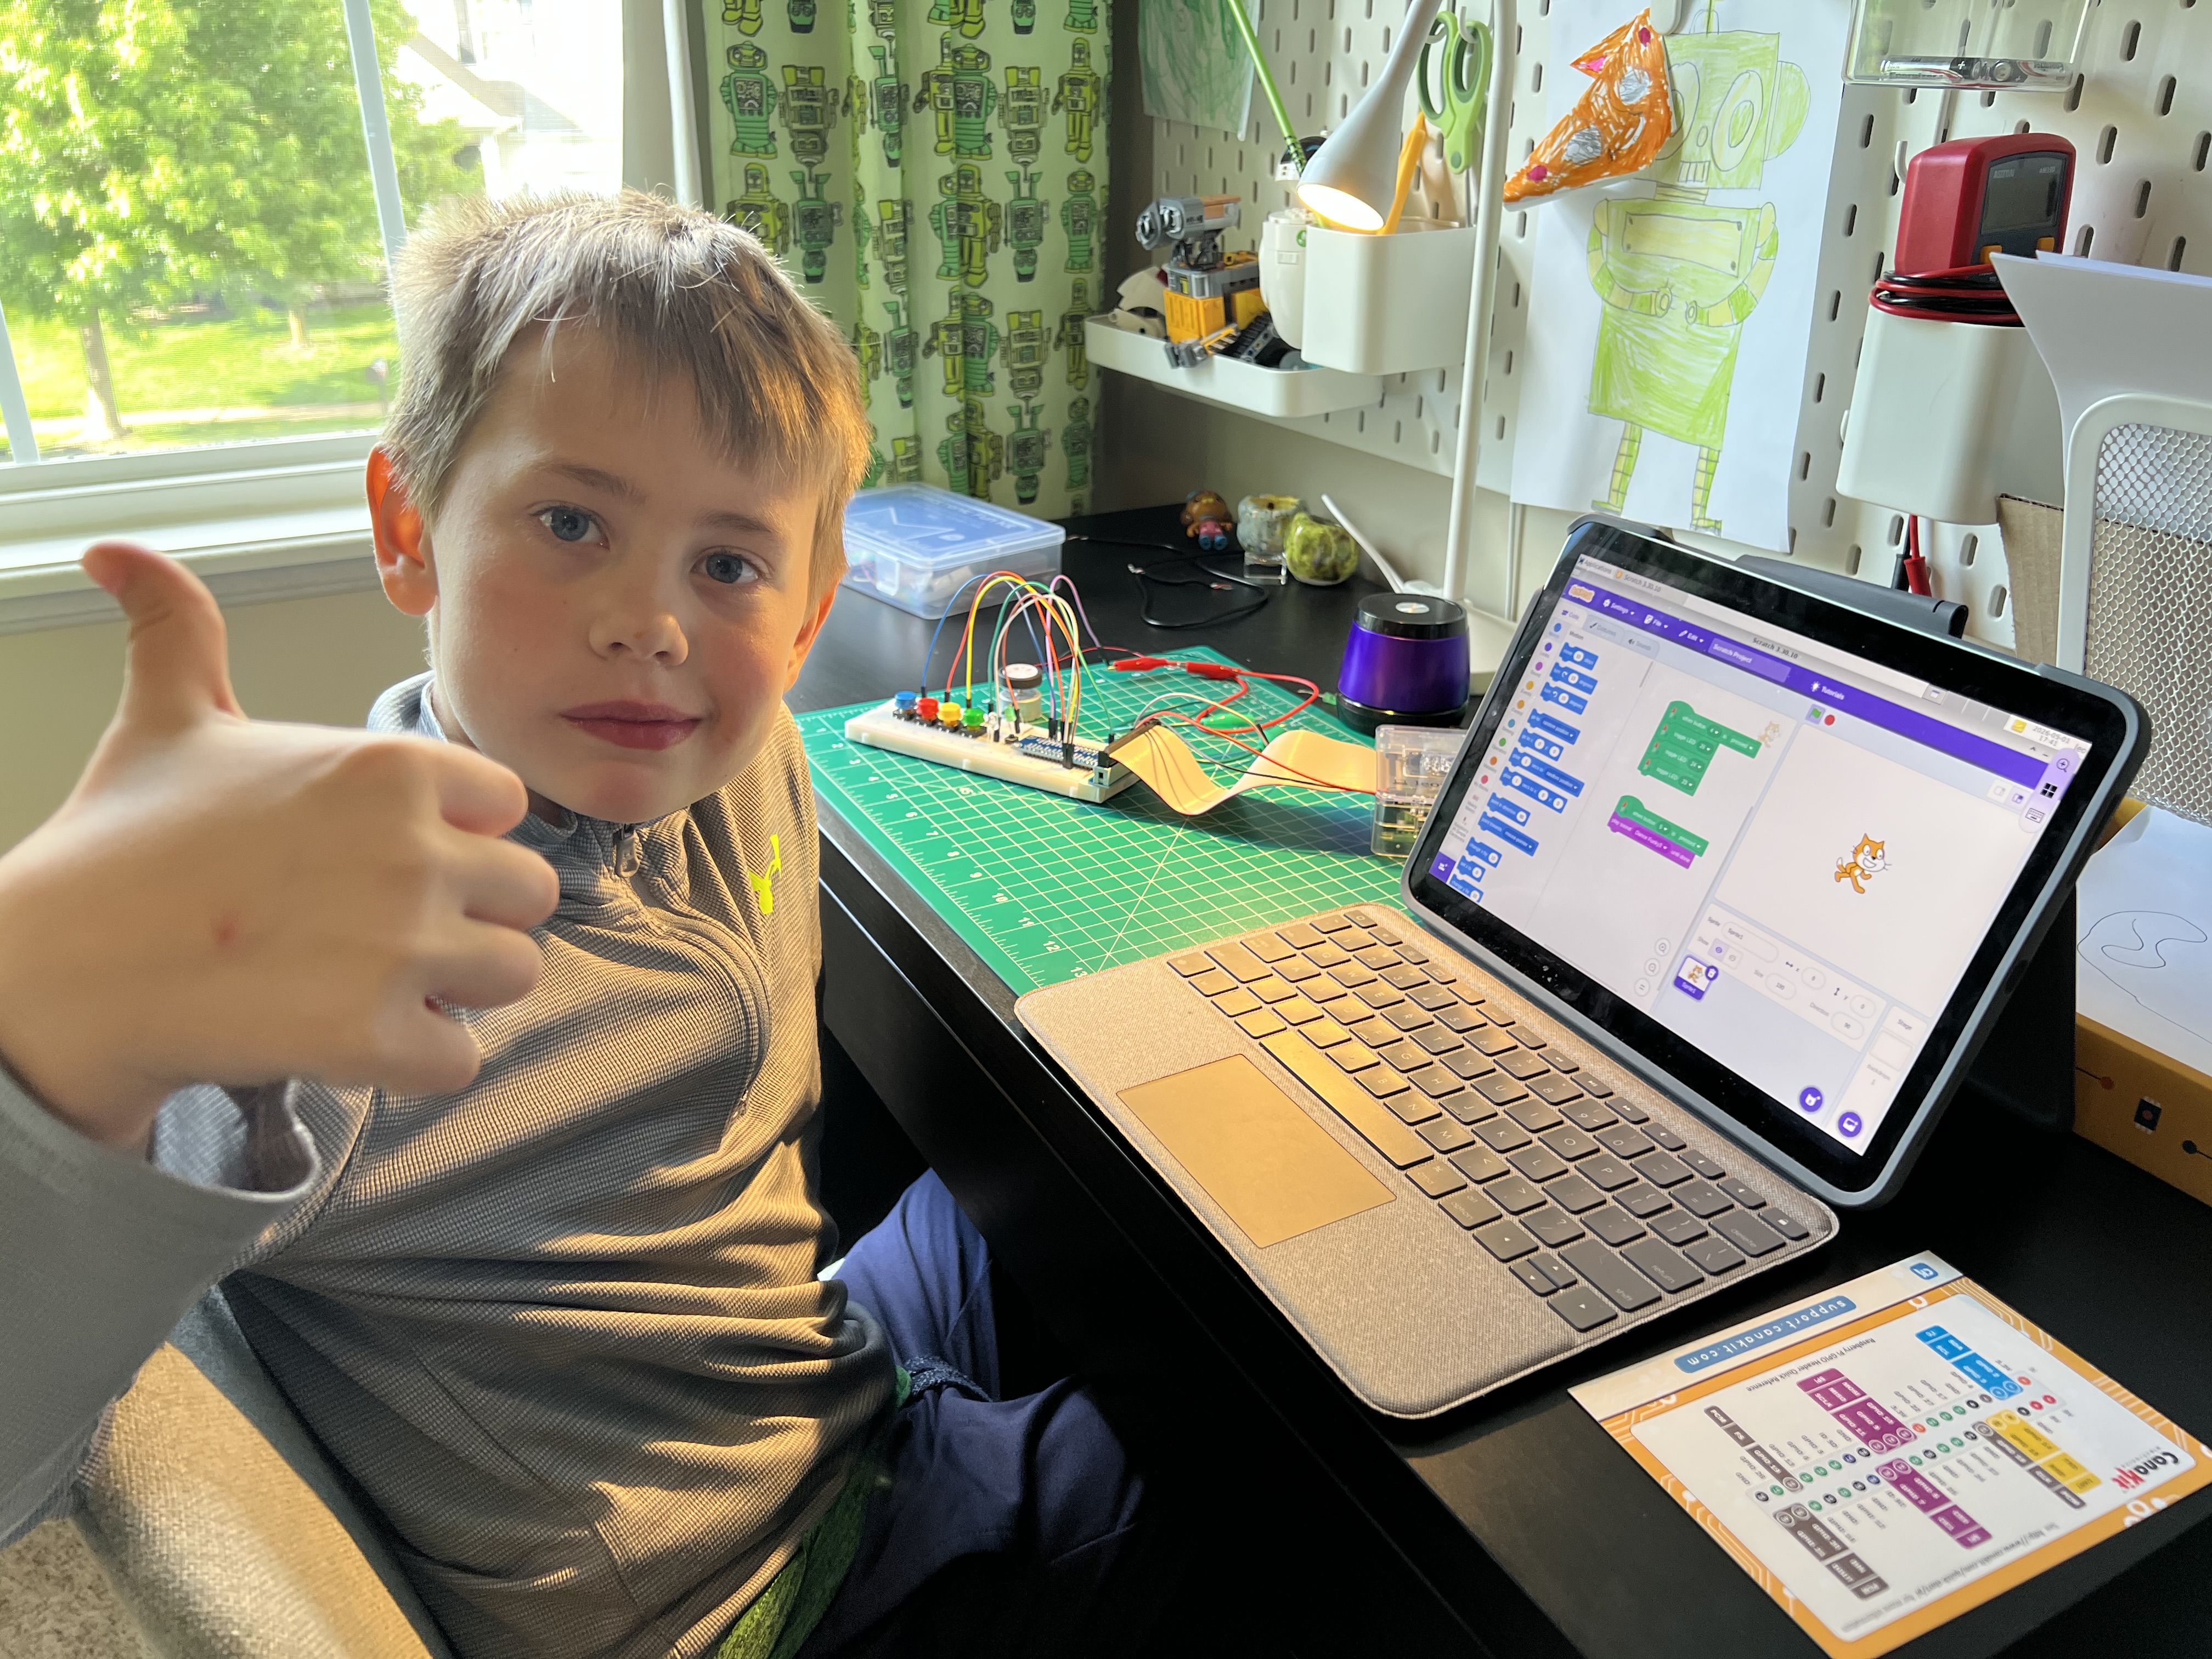
The other little bonus about this approach: I can SSH into the Pi at the same time he’s using RDP and make updates in the background. (I can’t update his Scratch programs that way, which is probably for the best.)
The workbench
Since then we’ve started to build out his own little electronics lab in his room — his Raspberry Pi sitting on his desk, ready to tinker with. The thing I’ve enjoyed most is that he keeps asking me to “make inventions” with him, so I feel like I’m doing something right. He actually just walked into the office as I was finishing this post to ask me to go make inventions in “the lab”. 😂
One of the primary reasons I started this blog was that I was having fun with him and wanted to document some of the silly, simple things we create as we learn. Hopefully some of our projects start to grow bigger and more elaborate over time. I try to take his outrageous ideas and find ways to bring them back to a practical level we can actually achieve — without losing whatever made him excited in the first place.
Raw markdown for LLMs: /posts/leos-tinker-pi.md · full index